My Concepts:


Monica's Concepts:

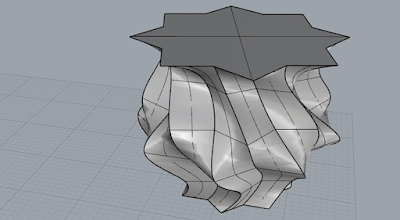

My Hybrid Ideas:

 +
+
Hybrid of my rocket and Monica's star object to make a rocket blasting off.
 +
+
Hybrid of my cone and Monica's star object, (The top will be capped in final object if this one is chosen).
I found this portion of the project to be a fun challenge. It was difficult to combine and come up with hybrids of both our objects while still retaining distinguishing features from both. None the less it was enjoyable and look forward to printing soon.


